Photography on a Budget: How to Shoot Product Photos That Sell Without a Studio

Most small sellers and first-time D2C founders in India delay getting their store live because they believe good product photography requires a professional studio, expensive gear, or a photographer on retainer. That belief costs them weeks of potential sales and often leads to a store launch that never quite happens.
The truth is that the gap between a poor product photo and a good one is rarely about equipment. It is almost entirely about light, background, and composition, three things you can control with a modern smartphone, a window, and a few inexpensive materials available at any stationery or hardware store in India.
This guide is written for small sellers, artisan brand founders, and D2C businesses in India who want product photos that genuinely convert browsers into buyers, without renting a studio or spending tens of thousands on a shoot. The principles here build directly on the broader framework in the product photography guide for Indian online stores and go deeper on the DIY and budget-specific execution side.
Why Product Photography Matters More Than Most Sellers Realise
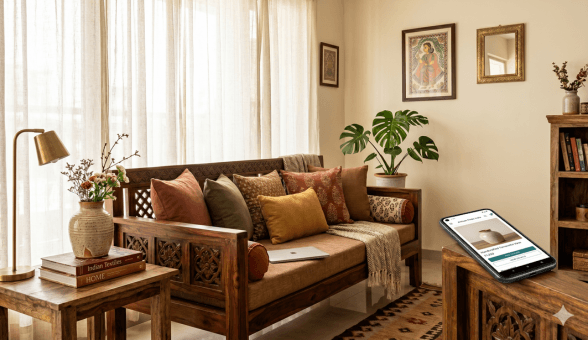
An Indian buyer shopping on your independent store cannot touch the product, smell it, or hold it up to the light. Your photographs are the product experience before the product arrives. A buyer who cannot visualise the item clearly will not take the risk of purchasing from a store they do not already trust. This is especially true for first-time visitors who have no prior history with your brand.
Research published by the Nielsen Norman Group on how users process images on product pages shows that high-quality, relevant product images are consistently among the most-viewed content on any product listing. Buyers look at images before they read descriptions, check prices, or look at reviews. The photograph forms the first impression that determines whether they continue reading or leave the page entirely.
For Indian sellers specifically, strong photography also compensates for the trust deficit that independent online stores face against large marketplace listings. A well-photographed product on a clean, consistent background communicates professionalism and attention to detail, two qualities that directly influence whether a first-time buyer is willing to enter their payment details on your checkout page.
Your Smartphone Is Good Enough: What You Actually Need
Any smartphone released in the last three to four years has a camera capable of producing product photos that are more than adequate for an online store. The cameras on mid-range Indian smartphones from brands like Redmi, Realme, Samsung, and Vivo routinely capture images at resolutions and quality levels that were only possible with DSLR cameras a few years ago.
What the phone cannot fix on its own is bad light, a cluttered background, or a shaky hold. Those are human decisions, and getting them right is what separates a usable product photo from a professional-looking one. You do not need to upgrade your phone. You need to learn three things: how to find and use natural light, how to build a simple clean background, and how to frame the shot consistently across your catalogue.
Camera Settings That Make a Difference
Before you shoot, turn off automatic HDR if it is enabled. HDR processing tends to oversaturate colours and flatten the natural texture of materials, which makes fabric, leather, and handmade products look artificial. Shoot in the standard photo mode with the grid overlay turned on so you can compose shots consistently.
Do not use digital zoom. If the product looks small in the frame, physically move the phone closer rather than zooming in. Digital zoom degrades image quality noticeably, particularly for products with fine detail such as embroidery, jewellery, or printed packaging. If your phone has a portrait mode, use it selectively for beauty, food, and small decorative items where background blur adds depth. For apparel and flat-lay products, use standard mode with a clear background instead.
Build Your Store with Photos That Actually Convert
Natural Light: The Single Biggest Upgrade You Can Make for Free
Light is the most important variable in product photography and also the most accessible one if you have a window. Natural daylight, particularly the indirect light from an open window on a bright day, is soft, even, and flattering to almost every product type. It shows textures accurately, renders colours faithfully, and does not create the harsh shadows that come from using a phone flash or a single artificial bulb.
The best setup is to place your product on a flat surface next to a window that receives bright but not direct sunlight. Direct sunlight creates strong, sharp shadows that cut across the product and make the image look uneven. Indirect light, meaning the light bounced off walls, clouds, or the sky rather than coming straight from the sun, spreads more evenly across the product surface.
In most Indian cities, the best times for this kind of natural window light are between 8 and 10 in the morning and between 4 and 6 in the evening. The midday sun in India is often too harsh and direct, even through a window. If you are shooting during midday, place a thin white cloth or a single layer of tissue paper over the window to diffuse the light and reduce harsh shadows.
Using Reflectors to Fill Shadow Areas
Even with good window light, one side of your product will typically be slightly darker than the other. A simple white foam board or a sheet of white chart paper placed on the shadow side of the product will bounce light back onto that side and give you a more evenly lit result. Foam boards are available at most Indian stationery shops for under Rs. 50 and are one of the most cost-effective photography tools a small seller can own.
If you are shooting products with shiny or reflective surfaces such as metal jewellery, glass bottles, or lacquered wooden items, position the foam board further away from the product to soften the reflection rather than creating a bright hot spot on the surface.
Background Options by Product Type and Budget
Your background determines the visual tone of your entire catalogue. Consistency across your product images is as important as quality for any single shot. Here is a practical guide to choosing the right background at different budget levels.
| Background Option | Best For | Estimated Cost |
| White chart paper or poster board | Small products, jewellery, food | Rs. 10 to Rs. 30 |
| White foam board (A2 or A1 size) | Most product categories | Rs. 40 to Rs. 80 |
| Plain fabric (white or light grey) | Apparel, textiles, home decor | Rs. 100 to Rs. 200 |
| Wooden plank or tile surface | Food, wellness, artisan products | Rs. 0 to Rs. 300 |
| Kraft paper or textured paper | Handmade, eco, gifting products | Rs. 20 to Rs. 60 |
White remains the most universally effective background for most Indian e-commerce categories. It puts full focus on the product, makes colour representation accurate, and creates a clean professional look that works across any device screen. If your brand has a strong identity that calls for a different background tone, such as natural wood for an organic wellness brand or dark slate for a premium grooming line, maintain that consistently across every product in your catalogue rather than mixing backgrounds between listings.
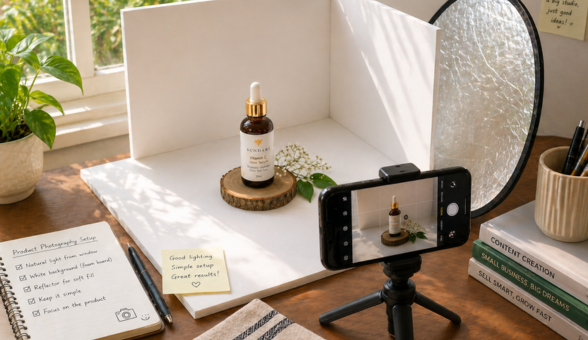
How to Build a Simple DIY Shooting Setup at Home
You do not need a dedicated room or studio space. A corner of your living room, bedroom, or even a terrace works well if it has access to natural light. Here is a setup that costs under Rs. 500 and produces consistent, professional-looking results for most Indian product categories.
Start with a flat, stable surface at a comfortable working height, a table or even the floor works depending on the product size. Place a large white foam board flat on the surface as your base. Prop a second white foam board vertically behind the first to create an L-shaped background that eliminates the visible line where the surface meets the wall. This is the same principle used in professional product photography lightboxes and is called a sweep background.
Position this setup near your best natural light window. Place your product on the base board, position your reflector foam board on the shadow side, and you have a shooting setup that rivals entry-level studio setups for small to mid-sized products. The total investment is three foam boards and your existing smartphone.
For sellers running fashion or apparel stores, a mannequin or a flat-lay arrangement on fabric produces better results than this setup for clothing. The approach to building a full online fashion store with photography and presentation considerations is covered in depth in the guide to launching a successful online fashion boutique which includes apparel-specific photography and catalogue structure guidance.
Build Your Store with Photos That Actually Convert
Shooting Techniques That Make a Real Difference
Once your setup is in place, the quality of each individual shot depends on a few consistent practices that separate sellers whose photos look polished from those whose photos look accidental.
Stabilise Your Phone for Every Shot
Camera shake is the most common reason DIY product photos look blurry or soft. Even a small amount of hand movement at close range is enough to reduce sharpness. Use a small tripod, which are available from Rs. 200 to Rs. 500 on Indian e-commerce platforms, or rest the phone against a stable object at the right height. If you are shooting by hand, use the volume button as the shutter trigger rather than tapping the screen, which reduces movement at the moment of capture.
Shoot Multiple Angles for Every Product
Every product listing needs at minimum three shots: a front-on or hero shot that shows the product clearly, a close-up that shows texture or detail, and a context shot that shows the product in use or alongside a scale reference. For apparel, this means a front view, a back view, and a detail of the fabric or any embellishment. For packaged products like skincare or food items, include a shot of the opened product if the interior is relevant to the buying decision.
Buyers who can see a product from multiple angles with relevant detail shots make purchase decisions faster and return items less frequently. The connection between thorough product page content and lower return rates is well established, and the specific tactics for building product pages that reduce buyer hesitation are detailed in the product page design and development guide which covers visual structure alongside copy and technical considerations.
Keep a Shot List Before Every Session
Going into a shoot without a plan leads to inconsistent results. Before each session, write down the exact shots you need for each product: hero, detail, lifestyle, and any variant or packaging images. This takes five minutes and saves hours of reshooting because you realised mid-upload that you missed the angle showing the product’s back or the label with the key ingredient.
Essential Shots Checklist by Product Category
Use this as a reference when planning your shoot sessions to ensure you never upload an incomplete set of product images.
| Product Category | Required Shots | Optional but Valuable |
| Apparel and fashion | Front, back, detail of fabric | On-model or flat-lay styled |
| Jewellery and accessories | Close-up, multiple angles, worn shot | Scale reference, box/packaging |
| Skincare and wellness | Label front, opened product, texture | Ingredient close-up, usage context |
| Food and packaged goods | Sealed pack, open contents, top-down | Ingredients arranged around pack |
| Home decor and gifts | Hero lifestyle, detail, scale reference | Grouped set or styled room context |
| Handmade and artisan | Full product, craft detail, maker’s hands | Process or origin context shot |
Editing Your Photos Without Expensive Software
Good editing can elevate a decent shot into a strong one. Poor editing can ruin a good shot. The goal of editing in product photography is correction, not transformation: straighten the image, adjust brightness so the product is clearly visible, and correct the white balance so colours appear accurate on screen.
For basic editing, the free built-in photo editor on your phone is sufficient for brightness, contrast, and crop adjustments. For more control, Snapseed is a free Android and iOS app that gives you precise control over shadows, highlights, sharpness, and perspective correction. It is used by independent sellers and professional photographers alike and costs nothing.
Avoid heavy filters, artificial vignettes, or saturation increases that make the product appear different from its real colour. A buyer who receives a product that looks noticeably different from the photo in terms of colour or finish will return it and leave a negative review. Accurate representation builds trust. Enhanced representation destroys it.
Background Removal for Clean White Backgrounds
If your shot has an imperfect background despite your best setup, a background removal tool can clean it up. Remove.bg is a free web-based tool that works well for most product shots, particularly items with clearly defined edges. For products with fine detail like jewellery chains or lace fabric, manual background removal in a tool like Canva Pro or Adobe Express gives better results. These are available at low monthly cost and are practical investments for any seller publishing more than 20 product listings.
Maintaining Consistency Across Your Entire Catalogue
A single great product photo is less valuable than a catalogue where every product looks like it belongs to the same brand. Consistency in background, lighting direction, image size, and shooting angle creates a visual identity that signals professionalism to buyers browsing your store.
Decide on your background, your light source, and your primary shooting angle before your first session and commit to those choices across your full catalogue. If you add new products three months later, recreate the same conditions rather than shooting in a different corner of your house with different light and a different background.
Consistent photography also improves your category pages and homepage significantly. When product thumbnails all share the same background and crop, the page looks intentional and trustworthy rather than assembled from random images. The impact of this on buyer confidence and store conversion rates is covered in the context of homepage optimisation for Indian e-commerce stores where visual consistency is highlighted as one of the most controllable trust signals on any store homepage.
Build Your Store with Photos That Actually Convert
DIY Photography vs Professional Studio: When Each Makes Sense
There is a point where investing in professional photography becomes the right decision. Here is a straightforward guide to help you decide where you are in that journey.
| Situation | Best Approach | Reason |
| Launching first 10 to 20 products | DIY with smartphone | Test market fit before investing |
| High-end jewellery or luxury goods | Professional shoot | Buyer expectations are higher |
| Fashion with models | Professional shoot | Requires styling and lighting expertise |
| Scaling to 100+ SKUs | DIY with a system | Volume makes DIY more efficient |
| Hero image for homepage or ads | Professional shoot | High-visibility image earns the investment |
| Handmade or artisan products | DIY with good light | Authenticity trumps studio polish here |
Making Product Photography a Sustainable Part of Your Operations
The sellers who produce the best product imagery consistently are not the ones who spend the most. They are the ones who have built a repeatable, low-friction process that they can execute in an hour or two per batch of new products. That process starts with a fixed setup, uses natural light intelligently, follows a shot checklist, and applies minimal corrective editing before uploading.
Build this system for your first 20 products and you will have something you can run efficiently for your next 200. Strong product photography is not a one-time investment, it is an operational habit that compounds in value as your catalogue grows, your brand becomes more recognisable, and your store conversion rate improves over time.
When you are ready to scale your store and your catalogue beyond what a solo operation can handle comfortably, exploring how Boomimart’s product catalogue and admin panel tools can support bulk product uploads, image management, and catalogue organisation will help you move from a manually managed store to one that scales without proportionally increasing your operational workload.