Product Photography Tips That Make Online Shoppers Click Buy Now

In a physical store, customers pick products up, feel the texture, check the weight, read the fine print on the packaging, and turn items over in their hands. Online, the product image does all of that work. Your photographs are the closest thing your customer gets to a physical experience with your product before they commit their money. If those images are poorly lit, blurry, badly composed, or fail to show the product accurately, you lose the sale. It is that simple.
Research consistently shows that product images are the single most influential factor in online purchase decisions. More than price. More than reviews. More than brand recognition. When a shopper lands on your product page, the image is the first thing their eyes go to, and it shapes every impression that follows. A crisp, well-lit photograph on a clean background communicates professionalism, quality, and trustworthiness before the customer reads a single word of your description.
The good news is that you do not need a professional studio or a Rs 2 lakh camera to take product photos that convert. With the right techniques, a modern smartphone, and some inexpensive tools, you can create product images that look professional enough to compete with established brands. This guide covers everything you need, from equipment and lighting to composition, editing, and optimization for your Boomimart online store.
Choosing Your Equipment: Smartphone, DSLR, or Professional Studio?
The first question every online seller asks about product photography is: what camera do I need? The honest answer might surprise you. Here is a realistic comparison of the three main equipment tiers:
| Factor | Smartphone (Budget Setup) | Entry DSLR/Mirrorless (Mid Setup) | Professional Studio |
| Camera Cost | Rs 0 (use existing phone) | Rs 30,000 to Rs 80,000 | Rs 1,50,000 to Rs 5,00,000+ |
| Lighting Cost | Rs 500 to Rs 2,000 (natural light + reflectors) | Rs 3,000 to Rs 10,000 (softbox kit) | Rs 20,000 to Rs 1,00,000 (studio strobes) |
| Background Setup | Rs 200 to Rs 1,000 (white chart paper, fabric) | Rs 1,500 to Rs 5,000 (backdrop stand + rolls) | Rs 5,000 to Rs 20,000 (seamless paper, sweep table) |
| Tripod/Stand | Rs 500 to Rs 1,500 (phone tripod) | Rs 2,000 to Rs 5,000 (camera tripod) | Rs 5,000 to Rs 15,000 (studio tripod + boom) |
| Editing Software | Free (Snapseed, Lightroom Mobile) | Rs 800/month (Lightroom + Photoshop) | Rs 1,600/month (Creative Cloud suite) |
| Total Initial Investment | Rs 1,200 to Rs 5,000 | Rs 37,000 to Rs 1,00,000 | Rs 2,00,000 to Rs 6,00,000+ |
| Image Quality | Good for most e-commerce (8/10) | Excellent with proper technique (9/10) | Studio-grade perfection (10/10) |
| Learning Curve | Low (most people know phone cameras) | Moderate (need to learn manual settings) | High (lighting, composition, post-processing) |
| Best For | Startups, small catalogs, daily product updates | Growing brands with 100+ SKUs | Premium brands, jewellery, luxury goods |
| Speed per Product | 3 to 5 minutes | 5 to 10 minutes | 15 to 30 minutes |
| Recommendation | Start here. Upgrade only when quality limits growth. | Upgrade when consistent quality matters for brand image. | Only when margins justify the investment. |
For most Indian online sellers, especially those just starting or managing catalogs under 500 products, a modern smartphone (released in the last 2 to 3 years) combined with proper lighting and technique will produce images that are more than good enough. The camera in a Rs 15,000 smartphone today is superior to professional cameras from a decade ago. What separates amateur-looking images from professional ones is not the camera. It is the lighting, the background, and the composition.
Lighting: The Single Most Important Factor in Product Photography
If you take away one lesson from this entire guide, let it be this: lighting makes or breaks product photography. A Rs 50,000 camera in bad light will produce worse results than a smartphone in good light. Understanding and controlling light is the fastest way to dramatically improve your product images.
Natural Light Setup (Best for Beginners)
Natural daylight is free, flattering, and produces accurate colours. Here is how to use it effectively:
- Position your shooting table next to a large window. North-facing windows (in India) provide the most consistent, soft light throughout the day because they never receive direct harsh sunlight.
- Shoot between 10 AM and 2 PM. This window gives you the strongest, most consistent natural light. Avoid early morning and late afternoon when light colour shifts towards warm tones.
- Diffuse direct sunlight. If sunlight is hitting your product directly, hang a white bedsheet or shower curtain over the window to soften it. Direct sunlight creates harsh shadows that look unflattering on products.
- Use a white reflector on the opposite side. A piece of white thermocol (Rs 30 to Rs 50) placed opposite the window bounces light back onto the shadowed side of your product, filling in dark areas and creating even illumination.
Artificial Light Setup (For Consistency)
If you shoot products regularly or need to photograph after daylight hours, invest in a basic artificial lighting kit:
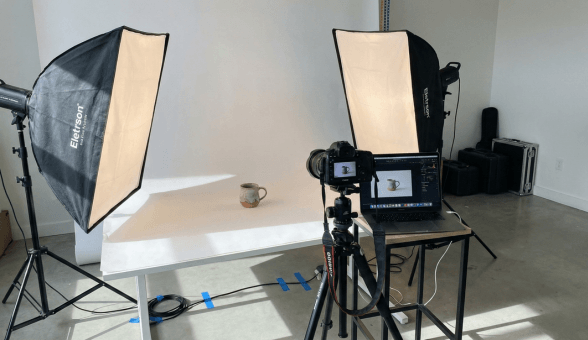
- Two softbox lights positioned at 45-degree angles on either side of the product provide even, shadow-free illumination. A basic dual softbox kit costs Rs 3,000 to Rs 6,000 online.
- Use daylight-balanced bulbs (5000K to 5500K). This temperature matches natural daylight and produces accurate colours. Avoid warm-toned bulbs that will shift your product colours towards yellow or orange.
- Add a third light from above for products that need top-down illumination (like food plating or flat-lay clothing shots).
- For small products (jewellery, cosmetics, electronics), a lightbox or light tent (Rs 800 to Rs 2,500) provides perfectly even lighting with zero shadows. These are particularly effective for reflective or metallic products.
Beautiful Products Deserve a Beautiful Store. See Boomimart in Action!
Background and Composition: Making Your Product the Star
The White Background Standard
For your primary product image (the one that appears in search results, category pages, and grid views), a pure white background is the universal standard. Here is why and how to achieve it:
- Why white? White backgrounds eliminate distractions, make your product the focal point, create consistency across your catalog, and look professional on any website theme. They also make it easier to compare products visually when browsing.
- Budget option: A large sheet of white chart paper (Rs 20 to Rs 30) curved from the wall to the table creates a seamless background. Replace it whenever it gets dirty or wrinkled.
- Better option: A white foam board (Rs 100 to Rs 200) or white fabric backdrop on a stand provides a reusable, consistently clean surface.
- Post-processing cleanup: Even with a white setup, your background may appear slightly grey in photos. Use the ‘Brightness’ or ‘Whites’ slider in Snapseed or Lightroom to push the background to pure white without overexposing the product.
Composition Rules That Work for Products
- Fill the frame. Your product should occupy 70% to 85% of the image area. Too much empty space makes the product look small and unimportant. Too little space feels cramped.
- Center your product. Unlike artistic photography where off-center compositions create visual interest, product photography works best with the product centered. Customers expect to see the product front and centre.
- Shoot from multiple angles. Every product needs at minimum: a front-facing hero shot, a back view, a side or three-quarter angle, and at least one close-up detail shot. More angles reduce customer uncertainty and lower return rates.
- Include scale reference. For products where size matters (furniture, bags, accessories), include something that gives viewers a sense of scale. A hand holding the product, a common object placed nearby, or a lifestyle shot showing the product in use all work.
- Show the product in context. After your white background shots, add 1 to 2 lifestyle images showing the product being used. A phone case on a phone. A kurta on a person. A kitchen appliance on a countertop. These contextual images help customers visualize owning the product.
For more on how product page design impacts conversion, including image placement, gallery layout, and zoom functionality, read our comprehensive guide on design and development techniques to improve your product page.
Category-Specific Photography Tips
Different products have different photography challenges. Here is a quick reference guide for the most common e-commerce categories:
| Product Category | Key Photography Challenge | Must-Have Shots | Pro Tips |
| Clothing and Fashion | Showing fit, fabric texture, and true colours | Flat lay, on-model or mannequin, detail close-up, back view | Use natural daylight for true colour reproduction. Steam garments to remove wrinkles. |
| Electronics and Gadgets | Reflective surfaces causing glare | Front, back, ports/buttons close-up, scale reference, in-use lifestyle | Use matte spray or polarizing filter for reflections. Show actual screen content. |
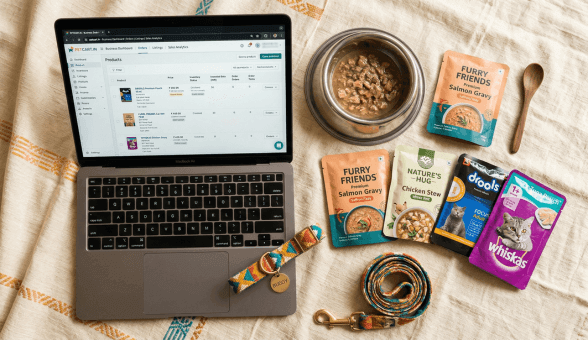
| Food and Grocery | Making food look appetizing through a screen | Hero shot with styling, ingredients spread, packaging, nutrition label | Shoot within 10 minutes of preparation. Use garnishes generously. |
| Jewellery | Capturing sparkle and fine detail at small scale | Macro close-up, worn on model, packaging, 360-degree angles | Use a lightbox and macro lens. Black velvet background for gold, white for silver. |
| Cosmetics and Skincare | Showing texture, colour accuracy, and premium feel | Product front, texture swatch, ingredients close-up, lifestyle context | Use a light tent for even lighting. Colour-calibrate your monitor. |
| Home Decor and Furniture | Showing scale and how items look in real rooms | Product solo on white, in-context lifestyle, dimension reference, detail | Use a room mockup or photograph in a styled space. Include a human or common object for scale. |
| Handmade and Artisan | Conveying craftsmanship and uniqueness | Finished product, in-progress craft shot, maker story, texture detail | Show imperfections proudly as authenticity markers. Include the artisan’s hands. |
| Books and Stationery | Making flat items look interesting and three-dimensional | Cover flat, angled 3D view, spread pages, styled with accessories | Prop books open at interesting pages. Use complementary accessories as styling elements. |
Boomimart supports multiple image uploads per product with drag-and-drop ordering, so you can showcase every angle and detail. For niche-specific e-commerce strategies that go beyond photography, explore our guides on launching an online fashion boutique, building a profitable electronics store, selling handloom and textiles online, and building a cosmetics online store.
Editing Your Product Photos: Essential Post-Processing Steps
Even well-shot photographs benefit from basic editing. The goal is not to misrepresent your product but to ensure the image accurately reflects how the product looks in person. Here is a practical editing workflow:
- Step 1: Crop and straighten. Crop to a consistent aspect ratio (1:1 square is recommended for e-commerce). Straighten any tilted horizons or products that appear to lean.
- Step 2: Adjust exposure and brightness. If the image is slightly dark or the white background appears grey, increase exposure until the background is pure white but the product retains detail.
- Step 3: Correct white balance. If your product colours look slightly warm (yellowish) or cool (bluish), adjust the white balance slider until colours appear natural and accurate. This is especially important for clothing and cosmetics where colour accuracy drives purchasing decisions.
- Step 4: Sharpen moderately. A touch of sharpening makes product details pop. But over-sharpening creates ugly halos around edges. Use the sharpening slider conservatively.
- Step 5: Remove background distractions. If your white background has dust spots, shadows, or imperfections, clean them up using the healing or clone tool.
- Step 6: Resize and compress. Export at 1000 x 1000 pixels minimum for e-commerce. Use JPEG quality of 80% to 85% to keep file sizes under 300 KB without visible quality loss. Large image files slow your page load speed, directly impacting conversions and SEO.
Free tools like Snapseed (mobile) and GIMP (desktop) handle all of these steps. For batch processing hundreds of images, Lightroom’s preset and batch export features save enormous time.
Beautiful Products Deserve a Beautiful Store. See Boomimart in Action!
Image Specifications for Your Online Store
Getting the technical specifications right ensures your images display beautifully across all devices, load quickly, and contribute to your SEO. Here is the complete reference:
| Specification | Recommended Standard | Why It Matters | How Boomimart Handles It |
| File Format | JPEG for web, PNG for transparent backgrounds | JPEG balances quality and file size. PNG needed for cutout images. | Supports both JPEG and PNG uploads |
| Image Dimensions | Minimum 1000 x 1000 pixels (square) | Allows zoom functionality. Square format works across all devices. | Responsive image display on web and mobile app |
| Aspect Ratio | 1:1 (square) for catalog; 4:3 or 16:9 for banners | Consistent aspect ratios create clean, professional grid layouts. | Consistent grid display in catalog |
| File Size | Under 500 KB per image (ideally 150 to 300 KB) | Large files slow page loading, increasing bounce rate and cart abandonment. | Image optimization on upload |
| Background | Pure white (#FFFFFF) for main product image | White backgrounds focus attention on the product and look professional. | Clean display against store theme |
| Number of Images | Minimum 4 to 6 per product | Multiple angles reduce uncertainty and return rates. | Multiple image slots per product |
| Alt Text | Descriptive, keyword-rich alt text for every image | Improves SEO and accessibility for visually impaired shoppers. | Alt text field in product editor |
| Colour Profile | sRGB colour space | sRGB is the web standard. Other profiles may display colours incorrectly. | Standard web colour rendering |
| Naming Convention | product-name-angle-colour.jpg (e.g., blue-cotton-tshirt-front.jpg) | Descriptive filenames improve SEO and organization. | File management in media library |
Properly optimized images directly impact your store’s loading speed, which in turn affects both conversion rates and search engine rankings. For a comprehensive approach to technical optimization, including schema markup for product images, read our guide on essential schema markup for e-commerce websites. And for broader SEO strategies that complement your image optimization, our e-commerce traffic management guide covers organic traffic growth tactics.
10 Product Photography Mistakes That Kill Conversions
- Using the product manufacturer’s generic images. If 50 other sellers use the same stock photos, your listing looks identical to theirs. Original photos differentiate your store and build trust.
- Photographing on cluttered or coloured backgrounds. A kitchen counter, a bedsheet, or a coloured wall as a background looks unprofessional and distracts from the product.
- Relying on the camera flash. Built-in flash creates harsh, flat lighting with ugly shadows. Always use natural light or external lighting instead.
- Not showing enough angles. A single front-facing photo leaves too many questions unanswered. Customers who are unsure do not buy. They leave.
- Over-editing to the point of misrepresentation. Making colours more vibrant than reality or hiding product flaws leads to returns, negative reviews, and trust erosion. Accuracy builds long-term loyalty.
- Ignoring mobile display. Over 75% of Indian e-commerce traffic is mobile. If your product details are not visible on a 5-inch screen, you lose those customers. Shoot close enough that product details are clear at small display sizes.
- Inconsistent image style across your catalog. Products shot with different backgrounds, lighting, and angles create a chaotic, unprofessional catalog. Consistency signals quality.
- Not including lifestyle or in-use images. White background shots tell shoppers what the product looks like. Lifestyle shots tell them what it feels like to own it. You need both.
- Uploading massive file sizes. A 5 MB product image looks identical to a 250 KB version on screen but loads 20 times slower. Always resize and compress before uploading.
- Forgetting alt text and SEO-friendly filenames. Images with descriptive alt text and meaningful filenames rank in Google Image search, driving free organic traffic to your product pages.
Building an Efficient Product Photography Workflow
When you have hundreds of products to photograph, efficiency matters as much as quality. Here is a batch workflow that lets you shoot 30 to 50 products in a single session:
- Prepare all products in advance. Clean, steam, unbox, and arrange everything before you start shooting. Iron clothing, polish jewellery, wipe electronics screens, and remove stickers or tags you do not want visible.
- Set up your station once. Position your background, lighting, and camera/tripod before your first shot. Mark the product placement spot with a small piece of tape so every item is positioned identically.
- Group similar products together. Shoot all white t-shirts together, then all blue ones, then all printed ones. Similar products need similar lighting adjustments, so grouping saves time.
- Shoot all angles of one product before moving to the next. Front, back, side, detail, lifestyle. Complete one product fully rather than shooting all fronts first, then all backs. This makes file organization much easier.
- Name files immediately. As you transfer images to your computer, name them with your SKU-based convention right away. product-name-angle.jpg is much easier to manage than IMG_4523.jpg.
- Batch edit with presets. In Lightroom or Snapseed, edit one image to perfection, save the settings as a preset, and apply it to all similar images in one click. This ensures consistency and saves hours.
- Upload to Boomimart in bulk. Use Boomimart’s product management interface to upload and arrange your images systematically, setting the hero image first and additional angles in logical order.
A well-organized photography workflow makes it practical to maintain a large, visually consistent catalog even as your product range grows. For a broader look at how your admin panel can streamline product management and catalog organization, explore our guide on boosting online e-commerce sales with your admin panel.
Beyond Photos: Product Videos and 360-Degree Views
Product photography is the foundation, but video content is increasingly driving e-commerce conversions. Consider adding these visual formats to your product pages as your resources allow:
- Short product videos (15 to 30 seconds). A slow rotation showing all angles, a brief demonstration of the product in use, or an unboxing sequence. These can be shot with the same smartphone and lighting setup you use for photos.
- 360-degree spin views. Particularly effective for electronics, accessories, and home decor. Shoot 24 to 36 images at equal rotational intervals and stitch them together using free tools like 3DVista or Sirv.
- Zoom-enabled high-resolution images. Upload images large enough (2000 x 2000 pixels) to support pinch-to-zoom on mobile. Boomimart’s product pages support zoom functionality, letting customers inspect fine details.
- User-generated content. Encourage customers to share photos of your products in use. These authentic images build trust more effectively than studio shots because they show the product in real-world conditions.
For insights on leveraging user-generated content and customer reviews alongside your product photography, read our guide on homepage optimization tips for e-commerce businesses.
Start Shooting: Your Product Photography Action Plan
Product photography is a skill that improves rapidly with practice. Do not wait for perfect equipment or a professional studio setup. Start today with what you have:
- Today: Set up a simple shooting station with a white background, natural window light, and a white reflector. Shoot your top 5 to 10 products using your smartphone.
- This week: Edit and upload your first batch to your Boomimart store. Compare how the new images look versus your existing ones.
- This month: Develop a consistent shooting and editing workflow. Re-photograph your entire catalog with consistent style.
- Next quarter: Evaluate whether your product category and growth justify investing in a dedicated lighting setup or DSLR camera based on the quality improvements you observe.
Great product photography is one of the highest-return investments you can make in your online store. Every image that accurately and attractively represents your product reduces hesitation, builds trust, and moves shoppers closer to clicking Buy Now. Combined with a fast, mobile-optimized store on Boomimart, your products get the presentation they deserve across web, mobile app, and WhatsApp commerce channels.
Request a free demo and see how Boomimart’s product management tools make it easy to upload, organize, and showcase your product images beautifully.